How to Sew Silk Charmeuse: A Manufacturer's Guide to Needles, Seams, and a Clean Finish


Silk charmeuse has a reputation as one of the hardest fabrics to sew. The satin face that gives it that liquid shine is the same thing that makes it slide, fray, and pucker the moment a needle touches it. Most of the trouble comes down to setup. The wrong needle, a stitch that runs too long, or a presser foot pushing the fabric around will wreck a seam on charmeuse when the same machine handles cotton without complaint.
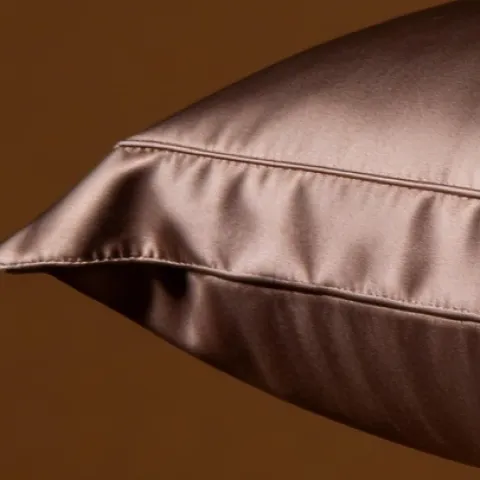
We sew silk charmeuse every day at our Suzhou facility, across scarves, pillowcases, pajamas, robes, and bias-cut dresses. This guide is the same setup-and-technique sequence our cutting and sewing teams follow to get clean seams and even hems on charmeuse at production scale. It works the same way at one machine or fifty.
Why Silk Charmeuse Is Difficult to Sew
Charmeuse is hard to sew for three reasons: the smooth satin surface slips against itself and against the machine bed, the fine yarns fray fast at any cut edge, and the fabric is light enough that the feed dogs or a heavy needle can drag it down and pucker the seam. Solve those three things at the setup stage and the fabric behaves.
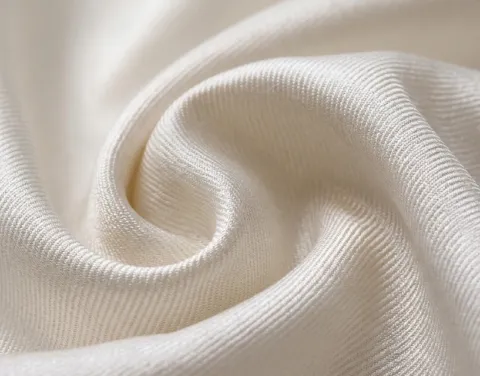
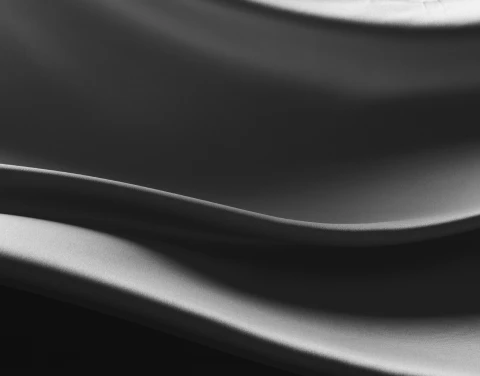
The satin weave floats long warp threads across the surface. That is what gives charmeuse its glossy, slippery face — there is almost no texture to grip onto. For the full breakdown of the weave, see our what is silk charmeuse guide.
Three properties drive every problem you will hit:
- Slip. The smooth faces shift while you cut and feed unevenly while you stitch.
- Fray. Cut edges ravel quickly because the floats let go; a raw seam will not survive washing.
- Pucker. A thick needle or a long stitch distorts the fine weave, and a feed system that drags leaves a wavy seam line.
Charmeuse is also weight-sensitive. A 16 momme scarf weight handles very differently from a 22 momme pillowcase weight. Lighter charmeuse slips and frays more; heavier charmeuse sits steadier under the foot. Knowing the momme of your fabric tells you which needle and stitch to start with — our silk momme weight guide covers the full range.
Tools and Machine Setup for Charmeuse
Most charmeuse problems are solved before the first seam, in how the machine is set up. This is the baseline our line runs on.
- Straight-stitch needle plate. The single most useful change. A plate with a small round hole stops the fabric from being pushed down into the bobbin area at the start of a seam. No plate on hand? A strip of tape over a wider plate is a workable stand-in.
- Straight-stitch or roller foot. A foot with a small opening supports the fabric right at the needle. A roller foot or a walking/dual-feed foot also moves the layers together instead of dragging the top one.
- Lower presser-foot pressure. Drop the pressure so the foot guides the fabric rather than shoving it ahead of the needle. Too much pressure is a main cause of wavy seams.
- Slightly looser top tension. Back the tension off a step or two from a cotton setting. Over-tight tension pulls the fine thread and gathers the seam.
- A clean machine. Wipe out lint and check for stray oil before you start. Both stain silk, and the mark does not always come out.
Run a test seam on a scrap of the same fabric every time. Two minutes spent checking thread, tension, and stitch length saves a ruined panel.
Cutting Silk Charmeuse Without Distortion
Cut charmeuse in a single layer over a gripping surface — tissue paper, kraft paper, or a cotton sheet — using pattern weights and sharp shears or a rotary cutter. Cutting it folded or on a bare table lets the fabric shift, and a piece cut off-grain turns into a twisted seam later.
The cutting stage decides whether your pieces are accurate. Charmeuse slides off-grain easily, and a piece cut even slightly off will never sew straight.
- Single layer, every time. Never cut charmeuse folded. The bottom layer shifts under the top and the two pieces come out different sizes.
- Lay it over paper or cotton. A layer of tissue or kraft paper under the silk grips it and stops it sliding across the table. Pin the silk to the paper at the edges and cut through both together.
- Weights over pins. Hold the pattern down with weights instead of pinning through the face. If you do pin, keep the pins inside the seam allowance — pin holes show on the finished face.
- Sharp blade. Use shears with a fine serrated edge (they grip the silk) or a rotary cutter on a mat. A dull blade drags and distorts the edge.
- Mark on grain. Use tailor's chalk or thread tacks, not a pen that can bleed into the weave.
At production scale we relax and square every roll on the cutting table before laying patterns, and we cut grain-critical pieces — bias panels especially — with extra margin so they can be trued up after the fabric settles.
Needle, Thread, and Stitch Settings by Momme
Three settings carry most of the seam quality: needle size, thread weight, and stitch length. All three scale with the momme of the fabric.
For most charmeuse, use a 70/10 Microtex needle, a fine polyester or 100-weight silk thread, and a 1.5 to 2.0 mm stitch. Start there and adjust by weight.
| Charmeuse weight | Typical use | Needle (Microtex / Sharp) | Stitch length | Notes |
|---|---|---|---|---|
| 12-16 momme | Scarves, linings, light blouses | 60/8 or 70/10 | 1.5-1.8 mm | Slips and frays most; tissue under seams |
| 19 momme | Pajamas, light dresses | 70/10 | 1.8-2.0 mm | The everyday mid-weight |
| 22 momme | Pillowcases, robes, dresses | 70/10 or 75/11 | 2.0 mm | Steadiest weight to handle |
| 25-30 momme | Heavy robes, structured pieces | 75/11 | 2.0-2.2 mm | Heavier hand, fewer slip issues |
Needles
Always start a charmeuse project with a fresh Microtex or Sharp needle. A blunt or universal point pushes between the yarns and leaves visible holes or snags. Change the needle the moment you see a pull. Skip ballpoint, denim, and heavy universal needles entirely — they are built for the wrong job.
Thread
The goal is a thread fine enough to bury in the seam without adding bulk. A fine polyester (around 60-weight) or a 100-weight silk thread both work, and fineness matters more than the fiber. Thick all-purpose thread sits on top of the fine weave and puckers the seam. If you go with polyester, test on a scrap first — some polyester stretches and then relaxes, which leaves a wavy line.
Starting and Feeding the Seam
Do not begin a seam right at the cut edge; the machine can pull it under. Use one of three fixes: hold both thread tails to the back for the first few stitches, start on a small fabric scrap and run straight onto your piece, or set the stitch length to zero for two or three stitches to anchor instead of backstitching. Sew at a steady, moderate speed. For the wider set of per-weight settings across silk types, see our silk sewing techniques guide.
Seams That Hold on Charmeuse
The French seam is the standard for charmeuse because it encloses the raw edge completely, so the fabric cannot fray inside the garment. It is the seam we use on almost every straight-seam charmeuse product — scarves, pillowcases, pajamas, and robes.
Charmeuse ravels aggressively. Any exposed raw edge will fray through with handling and washing, so the seam has to wrap the edge in.
How to Sew a French Seam on Charmeuse
- Place the two pieces wrong sides together. Stitch the first pass about 3/8" (1 cm) from the edge.
- Trim the seam allowance close, down to about 1/8" (3 mm). Trim cleanly — stray threads will poke through the finished seam.
- Press the seam flat, then fold the fabric right sides together along the stitch line, rolling that first line right to the fold.
- Stitch the second pass about 1/4" (6 mm) from the fold, enclosing the raw edge inside.
Keep French seams narrow, around 6 mm finished, so they stay soft and do not stiffen the drape.
Alternatives for Curved Seams
Where a French seam will not lie flat on a curve, use one of these instead:
- Narrow overlock. A 3-thread narrow overlock (or 2-thread for the lightest weights) finishes curves cleanly with little bulk. Ease off the thread tension so the edge does not curl.
- Bound (Hong Kong) seam. Wrapping the raw edge in a silk bias strip gives a couture finish on unlined pieces.
- Zigzag or seam sealant. On a scrap-tested basis, a fine zigzag over a trimmed edge, or a thin line of fray sealant, holds light fraying in check.
For anything cut on the bias — necklines, armholes, waist seams — stay-stitch the edge just inside the seam line before you handle the piece, so the bias cannot stretch out of shape while you work.
Hemming and Bias-Cut Charmeuse
Charmeuse hems should be narrow and light so they do not drag against the drape.
- Narrow double-fold (baby) hem. Press up 1/4", then another 1/4", and stitch close to the fold. The standard hem for scarves and light garments.
- Rolled hem on a serger. A 1 mm rolled hem gives a clean, fine edge; open it to about 2.5 mm for a softer picot look. This is how most silk scarf edges are finished in production.
- Bias binding for curves. A full or curved hem cannot just be turned up — bind it with a self-fabric bias strip instead.
Bias-cut charmeuse needs one extra step: let it hang. After construction, hang the garment on a form or hanger for 24 to 48 hours before levelling the hem. Bias fabric drops and settles over time; hem it too soon and the finished length goes uneven. We hang every bias-cut dress before the hem is marked — the construction detail behind that is covered in our custom silk dresses guide, and the finished pieces sit in our custom silk dress range.
Pressing Silk Charmeuse Correctly
Pressing makes or breaks the finish on charmeuse, and water is the main risk.
- Keep it dry, or barely steamed. Water drops spot the satin surface and the mark can be permanent. Use a dry iron on a silk/low setting, or very light steam from a distance if your fabric takes it — test first.
- Use a press cloth. A piece of silk organza or fine cotton between the iron and the face protects the surface. Press from the matte back where you can.
- Press, do not drag. Lift and lower the iron straight down instead of sliding it back and forth, which stretches and warps the weave.
- Meld, then open. Press the seam flat as sewn first to set the stitches, then press it open or to one side. This cuts down on puckering.
Troubleshooting Common Charmeuse Sewing Problems
The same handful of issues come up again and again. Here is what causes each one and how to fix it.
| Problem | Cause | Fix |
|---|---|---|
| Seam puckers or waves | Stitch too long, tension too tight, or presser pressure too high | Shorten stitch to 1.5-2.0 mm, loosen top tension, lower presser pressure |
| Fabric pulled into the machine | Starting at the edge over a wide needle hole | Fit a straight-stitch plate; start on a scrap or hold the thread tails back |
| Needle holes, snags, pulls | Blunt or wrong needle (universal, ballpoint, denim) | Fresh 60/8-75/11 Microtex; change at the first pull |
| Edges fray through | Raw seam left exposed | Use a French seam or narrow overlock to enclose the edge |
| Pieces sew up uneven | Cut folded or off-grain | Cut single-layer over paper, on grain, with weights |
| Bias hem goes wavy | Hemmed before the fabric settled | Hang 24-48 hrs, then level and hem |
| Water spots on the face | Steam or drips while pressing | Dry iron, press cloth, press from the back |
Sourcing Sewing-Ready Silk Charmeuse
A clean result starts with the fabric. Charmeuse that is properly degummed, pre-shrunk, and woven on consistent tension sews far more predictably than cheap, under-finished silk that shifts grain and shrinks after the first wash. For any run you plan to cut and sew, confirm the momme weight, the grade (6A mulberry is the top commercial grade), and that the fabric is pre-treated and certified — see what that covers on our certifications page.
DreamSilk weaves silk charmeuse fabric from 12 to 30 momme at our Suzhou facility, all Grade 6A mulberry silk and OEKO-TEX STANDARD 100 certified, supplied ready to cut. We also sew it in-house into finished goods — pillowcases and bedding, pajamas, and robes — so the same charmeuse is available as yardage or as a finished, private-label product.
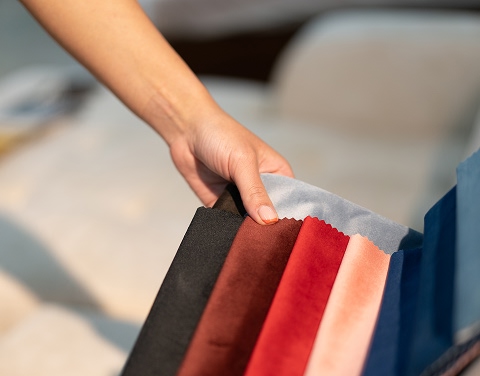
Tell us your product, target momme, and volume. We will send free fabric swatches in several weights so you can test the hand and run your own sew-out, along with a clear spec sheet. Explore our silk charmeuse fabric range or contact us for a quote to get started.
FAQ
Use a fine, sharp needle. A 70/10 Microtex (or Sharp) is the safe default for most charmeuse, dropping to 60/8 for lightweight scarf weights (12-16 momme) and 75/11 for heavier 22-30 momme. Always start with a fresh needle and change it the moment you see a pull. Skip universal, ballpoint, and denim needles — a blunt point leaves visible holes in the weave.